
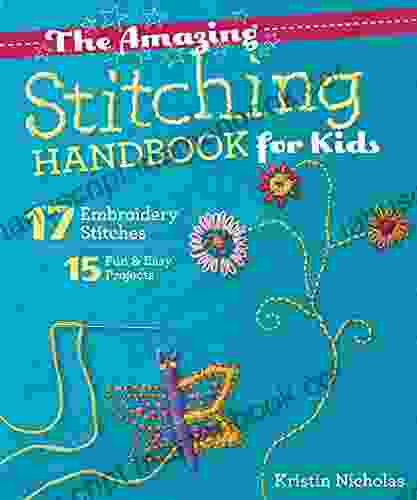
17 Embroidery Stitches and 15 Fun and Easy Projects to Practice Them

4.7 out of 5
| Language | : | English |
| File size | : | 19173 KB |
| Text-to-Speech | : | Enabled |
| Screen Reader | : | Supported |
| Enhanced typesetting | : | Enabled |
| Word Wise | : | Enabled |
| Print length | : | 244 pages |
| Lending | : | Enabled |
Embroidery is a beautiful and versatile craft that can be used to create a wide variety of projects, from simple embellishments to elaborate works of art. It is a great way to relax and de-stress, and it can also be a very rewarding hobby. If you are new to embroidery, there are a few basic stitches that you will need to learn. Once you have mastered these stitches, you can start to experiment with different projects and create your own unique designs.
17 Basic Embroidery Stitches
- Running stitch: This is the most basic embroidery stitch and it is used to create a straight line. To make a running stitch, simply bring the needle up through the fabric from the back, and then insert it back down into the fabric a short distance away. Repeat this process until you have created a line of stitches.
- Backstitch: This stitch is used to create a stronger and more durable line than the running stitch. To make a backstitch, bring the needle up through the fabric from the back, and then insert it back down into the fabric a short distance away. Next, bring the needle back up through the fabric at the point where you started the stitch. Repeat this process until you have created a line of stitches.
- Stem stitch: This stitch is used to create a thick, raised line. To make a stem stitch, bring the needle up through the fabric from the back, and then insert it back down into the fabric a short distance away. Next, bring the needle back up through the fabric at the point where you started the stitch, but this time, insert it into the fabric a short distance to the side of the first stitch. Repeat this process until you have created a line of stitches.
- Satin stitch: This stitch is used to create a smooth, shiny surface. To make a satin stitch, bring the needle up through the fabric from the back, and then insert it back down into the fabric a short distance away. Next, bring the needle back up through the fabric at the point where you started the stitch, but this time, insert it into the fabric directly next to the first stitch. Repeat this process until you have created a line of stitches.
- Chain stitch: This stitch is used to create a delicate, airy effect. To make a chain stitch, bring the needle up through the fabric from the back, and then insert it back down into the fabric a short distance away. Next, bring the needle back up through the loop that you have created, and then insert it back down into the fabric a short distance to the side of the first stitch. Repeat this process until you have created a line of stitches.
- French knot: This stitch is used to create a small, raised knot. To make a French knot, bring the needle up through the fabric from the back, and then wrap the thread around the needle twice. Next, insert the needle back down into the fabric at the point where you started the stitch, and pull the thread through to create a knot. Repeat this process until you have created a line of stitches.
- Lazy daisy stitch: This stitch is used to create a small, delicate flower. To make a lazy daisy stitch, bring the needle up through the fabric from the back, and then insert it back down into the fabric a short distance away. Next, bring the needle back up through the fabric at the point where you started the stitch, and then insert it back down into the fabric a short distance to the side of the first stitch. Repeat this process four times to create a loop. Next, bring the needle back up through the fabric at the point where you started the stitch, and then insert it back down into the fabric in the center of the loop. Pull the thread through to create a knot and secure the flower.
- Bullion knot: This stitch is used to create a small, raised sphere. To make a bullion knot, bring the needle up through the fabric from the back, and then wrap the thread around the needle several times. Next, insert the needle back down into the fabric at the point where you started the stitch, and pull the thread through to create a knot. Repeat this process until you have created a small, raised sphere.
- Cast-on stitch: This stitch is used to create a decorative edge. To make a cast-on stitch, bring the needle up through the fabric from the back, and then insert it back down into the fabric a short distance away. Next, bring the needle back up through the fabric at the point where you started the stitch, and then insert it back down into the fabric a short distance to the side of the first stitch. Repeat this process until you have created a line of stitches.
- Cross-stitch: This stitch is used to create a variety of designs. To make a cross-stitch, bring the needle up through the fabric from the back, and then insert it back down into the fabric two squares away. Next, bring the needle back up through the fabric one square to the left of the first stitch, and then insert it back down into the fabric one square below the first stitch. Repeat this process to create a cross-stitch.
- Needlepoint: This stitch is used to create a variety of designs on canvas. To make a needlepoint stitch, bring the needle up through the canvas from the back, and then insert it back down into the canvas two squares away. Next, bring the needle back up through the canvas one square to the left of the first stitch, and then insert it back down into the canvas one square below the first stitch. Repeat this process to create a needlepoint stitch.
- Crewel embroidery: This stitch is used to create a variety of designs on fabric. To make a crewel embroidery stitch, bring the needle up through the fabric from the back, and then insert it back down into the fabric a short distance away. Next, bring the needle back up through the fabric at the point where you started the stitch, and then insert it back down into the fabric a short distance to the side of the first stitch. Repeat this process until you have created a line of stitches.
- Tambour embroidery: This stitch is used to create a variety of designs on fabric. To make a tambour embroidery stitch, bring the needle up through the fabric from the back, and then insert it back down into the fabric a short distance away. Next, bring the needle back up through the fabric at the point where you started the stitch, and then insert it back down into the fabric a short distance to the side of the first stitch. Repeat this process until you have created a line of stitches.
- Punch needle embroidery: This stitch is used to create a variety of designs on fabric. To make a punch needle embroidery stitch, bring the needle up through the fabric from the back, and then insert it back down into the fabric a short distance away. Next, bring the needle back up through the fabric at the point where you started the stitch, and then insert it back down into the fabric a short distance to the side of the first stitch. Repeat this process until you have created a line of stitches.
- Schiffli embroidery: This stitch is used to create a variety of designs on fabric. To make a schiffli embroidery stitch, bring the needle up through the fabric from the back, and then insert it back down into the fabric a short distance away. Next, bring the needle back up through the fabric at the point where you started the stitch, and then insert it back down into the fabric a short distance to the side of the first stitch. Repeat this process until you have created a line of stitches.
- Appliqué: This technique is used to add fabric to fabric. To appliqué, cut out a piece of fabric into the desired shape, and then sew it onto another piece of fabric. Appliqué can be used to create a variety of designs.
15 Fun and
4.7 out of 5
| Language | : | English |
| File size | : | 19173 KB |
| Text-to-Speech | : | Enabled |
| Screen Reader | : | Supported |
| Enhanced typesetting | : | Enabled |
| Word Wise | : | Enabled |
| Print length | : | 244 pages |
| Lending | : | Enabled |
Do you want to contribute by writing guest posts on this blog?
Please contact us and send us a resume of previous articles that you have written.
 Top Book
 Novel
Novel Fiction
 Nonfiction
 Literature
 Paperback
 Hardcover
 E-book
 Audiobook
 Bestseller
 Classic
 Mystery
 Thriller
 Romance
 Fantasy
 Science Fiction
 Biography
 Memoir
 Autobiography
 Poetry
 Drama
Drama Historical Fiction
 Self-help
 Young Adult
 Childrens Books
 Graphic Novel
 Anthology
 Series
 Encyclopedia
 Reference
 Guidebook
 Textbook
 Workbook
 Journal
 Diary
Diary Manuscript
 Folio
Folio Pulp Fiction
 Short Stories
 Fairy Tales
 Fables
 Mythology
 Philosophy
 Religion
 Spirituality
 Essays
 Critique
 Commentary
 Glossary
 Bibliography
 Index
Index Table of Contents
 Preface
 Introduction
 Foreword
 Afterword
 Appendices
 Annotations
 Footnotes
 Epilogue
 Prologue
 Edward Bellamy
 J Bart Klika
 Crystal Parker Duffy
 John Wilker
 Guy Davenport
 Mark Russell
 Indu Sundaresan
 Alan Taylor
 Kelly Cutrone
 Nurse Academy
 Clarence B Jones
 James Mascia
 Kathleen Harryman
 Eric Raillard
 Giedre Rakauskaite Gie Dra
 Hupport
 S D Sykes
 Jerrold Mundis
 Carole Satyamurti
 Lana Popovic
Light bulbAdvertise smarter! Our strategic ad space ensures maximum exposure. Reserve your spot today!


 Ryūnosuke AkutagawaBlogging For Beginners: Basic Steps To Blogging For Profits - How To Make...


 Gary ReedFollow ·11.5k
 Eli BlairFollow ·19.9k
 Lucas ReedFollow ·14.4k
 Michael SimmonsFollow ·3.4k
 David Foster WallaceFollow ·15.7k
 Edgar CoxFollow ·12.2k
 Miguel de CervantesFollow ·9.8k
 Carter HayesFollow ·5.5k

 Jaylen Mitchell
Pretime Piano Jazz Blues Primer Level: A Comprehensive...
The Pretime Piano...
 Mark Twain
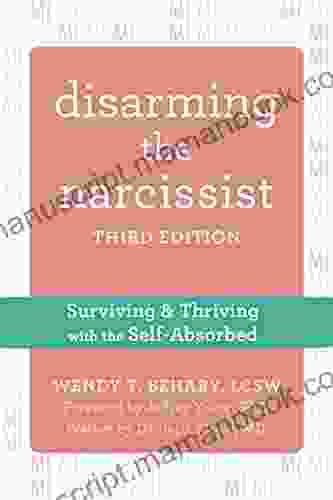
Surviving and Thriving with the Self-Absorbed: A...
Interacting with self-absorbed...
 Manuel Butler
 John Keats
To Love Is To Surrender: A Deep Dive into the...
Surrender is one of the most enigmatic and...

 Steven Hayes
Rich Murphy: A Visionary Engineer Shaping the Future of...
In the annals of space...
 Neil Parker
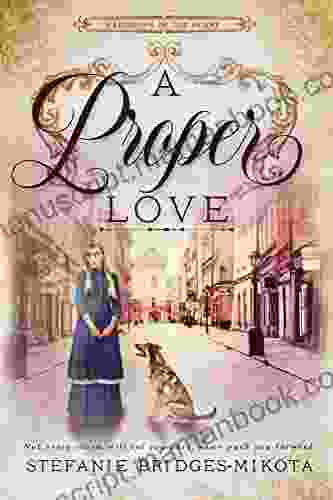
Proper Love: Navigating the Hardships of the Heart
Love is a beautiful emotion that can bring...
4.7 out of 5
| Language | : | English |
| File size | : | 19173 KB |
| Text-to-Speech | : | Enabled |
| Screen Reader | : | Supported |
| Enhanced typesetting | : | Enabled |
| Word Wise | : | Enabled |
| Print length | : | 244 pages |
| Lending | : | Enabled |
